
The stand overlooked a plot split between Antler King’s Trophy Clover and Honey Hole products. It’s always been one of the hottest stands on this particular piece of ground, so I wasn’t shocked to see my Reconyx held photos of the buck I was after.
My stand sit was as close to a disaster as it could be. Despite my squeaky stand, two flocks of turkeys, a bobcat and my own personal dose of mistakes, somehow a “hot” doe kept coming back each time something new spooked her off. With the food being too good to resist, she was seemingly un-spookable. And the same lovestruck buck followed her in each time. That is, until my Mathews sent a Rage Xtreme-tipped Easton into flight.
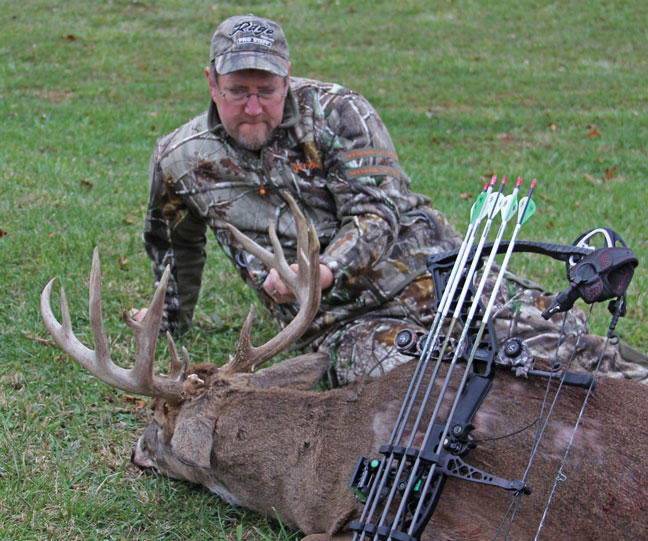
The rewards of a quality food source. Photo by Steve Bartylla
Most food plot users can, after witnessing for themselves the benefits, fully understand the difference a thriving food plot can make. When laid out and hunted correctly, food plots can produce thrilling hunts, often when odds are stacked against the hunter.
The most inaccurate misconception when it comes to food plots is that they’re too expensive for the average hunter to plant and maintain. In reality, food plots don’t have to cost an arm and a leg. In fact, on the four acres of food plot on which I arrowed this buck, name-brand seed was used, but it still was put in for under $200. As a cherry on top, the method used to install this plot offers benefits to the soil, and the planting requires nothing more than a backpack sprayer and hand seeder. Here’s how to pull off food plots on the cheap.
UNDERSTANDING SOIL CONTACT AND THATCH
Before trying to explain the steps involved in implementing a budget food plot, we must understand seed-to-soil contact. At the most basic level, if seeds don’t come into direct contact with the soil, the germination rate suffers. Food plotters will benefit greatly from understanding the potential problem of poor contact and working to avoid it.
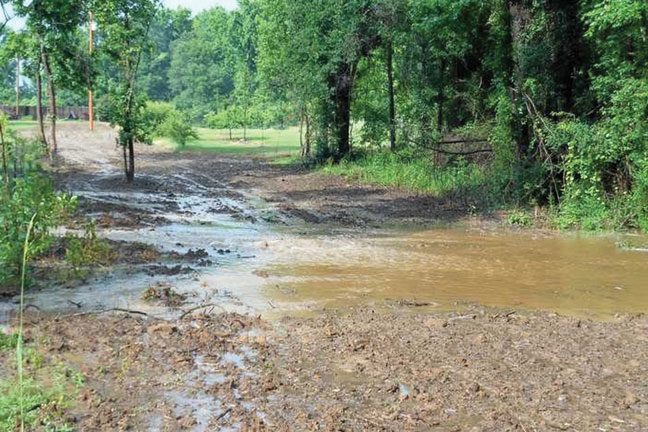
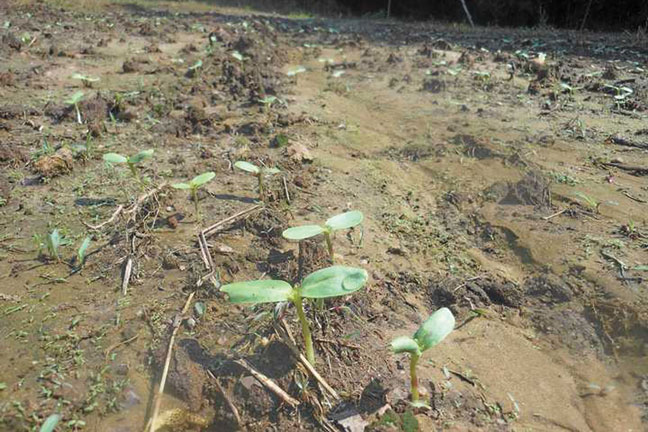
Exposed soils are poorly suited to capturing and holding rainwater. In such cases, no-till planting can be the answer. Photo by Steve Bartylla
Balancing maximum germination rates and the seedlings’ ability to survive is why plantings come with recommended planting depths. On exposed dirt, the top dries out much faster than the subsurface. So getting the seeds deeper into the dirt, within reason, typically increases germinating moisture.
Planting a seed deeper also provides more root depth before emergence. However, plant a seed too deep and the seedling can’t break to the surface. Deeper still, and it won’t germinate at all.
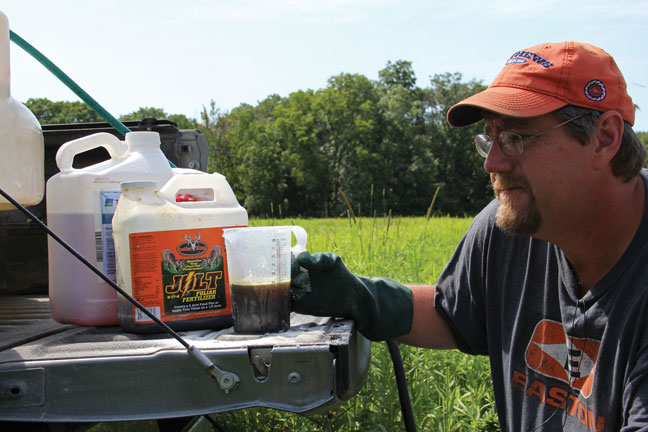
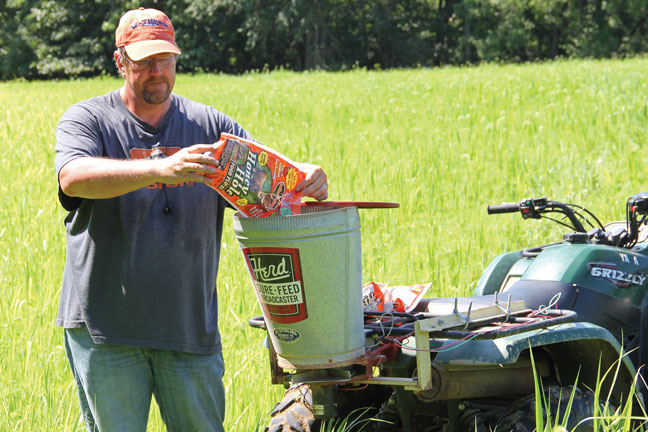
Foliar fertilizers are good alternatives when working fertilizer into the soil isn’t a viable option. Photo by Steve Bartylla
In general, the larger the seed, the more moisture required for germination. Likewise, bigger seeds have a greater ability to break through dirt and can be planted deeper.
Thatch is the very important layer of dead plant life covering the surface of the ground. This is a term every food plotter needs to be well aware of, as it plays a fundamental role in seed germination.
In the technique being described, the thatch layer can be used to create an artificial blanket over seeds broadcast on the surface. When done properly, thatch shades the top of the soil, allowing it to hold moisture longer. At the same time, the thatch layer itself holds moisture. In turn, when pressed between dirt and a layer of thatch, many seed types can germinate at nearly as high a rate as when planted into a properly prepared seedbed. This is particularly true of smaller seed types, such as clovers and many brassicas. Also, high success rates have been recorded in larger seeds with softer, more absorbent outer husks and shells, such as oats, wheat and cereal rye.
Where this concept struggles is with larger, hard-shelled seeds, such as corn or soybeans. It can work with both, but the technique too often fails to produce close to the same germination rates as when the seeds are drilled into the soil. For larger seeds with hard shells, planters should be used so the seeds are properly “disced” into the soil.
MAKING IT HAPPEN
The most common situation in which to use the “thatch blanket” method for fall food plots is with areas that were planted the previous season. Assuming some weed and/or grass growth has since occurred, this environment is ideal. The dirt typically isn’t covered in an impenetrable matt of thatch. Instead, a thinner layer of thatch offers a protective, blanket-like layer.
Once seed-to-soil contact has been established, and a potential thatch layer has been identified, the steps are simple.
First, spray all weeds with Roundup or a generic equivalent contact weed killer. It’s a good idea to incorporate additives to increase the herbicide’s effectiveness. You also must be certain the herbicide you’re using doesn’t contain a residual weed killer. Residual weed killers are often used by farmers to suppress weeds from re-establishing in plantings of Roundup-Ready crops.
Rather than cover all of the details of how residual weed killers work, we suggest you purchase these products from your local grain dealer. When you do, explain that you’ll be following the spraying with a top-seeding of non-Roundup Ready plants. Go with their recommendation of product combinations and application rates.

Also, as not all variations of contact weed and grass killers are equal, ask how long it will take for the application to kill the weeds.
When buying directly from farm suppliers, you typically can’t get the smaller quantities offered in other stores’ garden departments. However, the price per acre of glyphosate-based herbicides, the active ingredient in Roundup and its generic equivalents, is typically dramatically cheaper per ounce.
You’ll most likely be buying the 2.5-gallon jugs. Provided the contents aren’t mixed with water or subjected to temperature extremes, the container can be effectively stored for five years or more. So the larger quantity of weed killer isn’t likely to go to waste, and it’s a real cost saver over time.
When planning a time for spraying, first determine the ideal planting date for your fall plot, based on the area you’re hunting. When you’ve determined optimal planting times, simply back off the number of days it takes for the herbicide to do its job, and spray then. This spraying can be done with a backpack, 4-wheeler or pull-behind sprayer.
Once the suggested number of days have passed for a weed killer’s maximum effectiveness, it’s time for planting. Note that there’s some flexibility in this date, but once the weed killer has started doing its job, you should be fast behind. Really, the biggest key is to ensure the weeds haven’t all fallen over yet, but the herbicide has had ample time to be absorbed by the plant.
The other key is timing your planting with rain. Seeds can and will survive for some time before germinating moisture levels are achieved, but the faster they germinate after hitting the dirt, the better. Finishing your planting within a day or two of forecasted rain is optimal.

It’s advisable to spread seeds at 125 percent of the suggested planting rate when using a hand spreader or ATV/UTV-pulled broadcast spreader. The 125 percent spread rate ensures greater germination levels without great risk of overcrowding. Importantly, though, this rule should not be applied to brassica mixes. With brassicas, you’d almost always rather have your stand be a bit too thin than too thick. Most members of the brassica family thrive with a little elbow room but stunt when a stand is too thick.
After seeding, the hard work is essentially done. Just walk away and pray for rain. The treated weeds and grasses eventually will lie down on their own, creating the thatch blanket effect you’re after. However, mowing the now-dead growth as low as you can without hitting dirt can provide superior results. As an alternative, flattening with a drag can also be highly successful. Both methods better snug seeds under the thatch and instantly offer germination and moisture-retention advantages.
REAPING THE BENEFITS
Aside from being less work, there are many advantages to no-till food plotting, such as increasing organic matter in the soil and improving the soil. It would take a separate article to even begin to explain all of these benefits, but for now, just know that this method also helps increase your soil health. Whether you’re cash cropping or food plotting, the healthier the soil, the better the potential yield of your plantings.
Also, please note that these aren’t the extent of how no-till planting can be effectively used. Frost seeding, broadcasting into grassy areas, and other sorts of creative methods also can be used with great success. The common denominator in each case is that a thatch layer helps maximize plot productivity.